サイドバーの外枠
サイドバーに外枠をつけよう
/*—–Side—–*/ とあります。
その中の .sidebar { へ border:1px solid #9a9a9a; を付け加えます。
| /*—–Side—–*/ .sidebar { width:198px; padding-left:5px; padding-right:5px; padding-bottom:10px; border:1px solid #9a9a9a; margin-bottom:10px; overflow:hidden; } |
・ border:1px の数字を変えると線の太さが変わります。
・ solid は線の種類です。solidを↓↓の種類に変えることもできます。
solid(普通の線)
double(二重の線)
groove(谷型の線)
ridge(山型の線)
inset(凹型)
outset(凸型)
dotted(点線) 一部の古いブラウザでは未対応
dashed(大きい点線) 一部の古いブラウザでは未対応
none(線なし)
・ #9a9a9a; は線の色の指定です。
↓ 線とカラーはこちらを参考にしてください ↓

サイドバーの外枠を画像で作ろう
サイドバーの外枠を、線ではなく画像で囲みます。
画像で囲めば、角の丸いもの、線がグラデーションしているものなど、オリジナルなものが作れます。

[用意するもの]
自分のサイドバーの横幅に合わせた画像を3つ用意します。
*自分のサイドバーの横幅は .sidebar { の中に width:190px; という記述があると思います。
[作成]
【1】topの画像を入れる
■自分の作った画像の高さを記入する
height: 40px;
■画像を挿入する
background:url(“/_images/blog/_aaa/bbb/ccccc.PNG”) no-repeat;
/*—–Side—–*/ とあります。
その中の .sidebar-title { へ background:url(“/_images/blog/_aaa/bbb/ccccc.PNG”) no-repeat; を付け加えます。
| /*—–Side—–*/ .sidebar-title { margin:0; padding: 12px 0px 0px 35px; height: 40px; background:url(“/_images/blog/_aaa/bbb/ccccc.PNG”) no-repeat; font-size:x-small; font-weight:normal; } |
【2】sideの画像を入れる
■画像を挿入する 画像を縦に繰り返す必要があるので、repeat-y を入れる
background:url(“/_images/blog/_aaa/bbb/ccccc.PNG”) repeat-y;
| /*—–Side—–*/ .sidebar { width:190px; margin-bottom:10px; background:url(“/_images/blog/_aaa/bbb/ccccc.PNG”) repeat-y; overflow:hidden; } |
【3】bottomの画像を入れる
.sidebar-end{ という記述がない場合は、新たに書き込む。
■自分の作った画像の高さを記入する
height: 20px;
■画像を挿入する
background:url(“/_images/blog/_aaa/bbb/ccccc.PNG”) no-repeat;
| /*—–Side—–*/ .sidebar-end{ height: 20px; background:url(“/_images/blog/_aaa/bbb/ccccc.PNG”) no-repeat; } |
*画像の透過などにも気を配って作ってみてください。
サイドバー全体
サイドバーに背景色をつけよう
/*—–Side—–*/ とあります。
その中の .sidebar { へ background-color:#cccccc; を付け加えます。
| /*—–Side—–*/ .sidebar { width:198px; padding-bottom:10px; border:1px solid #9a9a9a; margin-bottom:10px; background-color:#cccccc; overflow:hidden; } |
↓ 背景色と画像 についてはこちらを参考にしてください ↓
サイドバータイトル
サイドバータイトルとバナーの間に空白を作ろう
■これは、[シンプルワイド・スタンダード1]を使って作ってる方が対象です。
[スタンダード2]は自動で空白が入ります。
/*—–Content—–*/ とあります。 その中へ付け加えます。
| /*—–Content—–*/ #content { padding-top:10px; } |
padding-top:10px;の10pxの数字を書き換えると幅が変わります。
ご自分で調整してみてください。
サイドバータイトルに小さな画像を入れてみよう
ここでは書き込む順番が大切です。
タグを書き込む順番に気をつけましょう。
〔例:シンプルワイドのタグ〕
/*—–Side—–*/
| .sidebar-title { margin:0; margin-bottom:10px; padding:5px 10px; border-bottom:1px dotted #9a9a9a; font-size:x-small; color:#1c1c1c; } |
①padding:5px 10px;の数字を変えましょう
3pxの方が上下の幅 10pxの方が左からの幅です。
左からの幅を広げて画像を入れる隙間を作りましょう
②background:url(/blog/_images/blog/_***/*****/1234567.gif) no-repeat left center;
こんな風なタグを入れます。
入れたい画像をアップロードしてクリックすると
background:url(/blog/_images/blog/_***/*****/1234567.gif) no-repeat; こう入ります。
まず no-repeat; の ; を消します。
次に left center を書き加えます。
忘れずに最後に ; を書き加えます。
・leftは画像を左に入れるという意味(右に入れたいときは right)
・centerは上下の真ん中に画像を入れるという意味
③画像の後ろに色をつけたいときは background-color:#BBC6FE; と書き加えます。
デフォルトでは「color:#1c1c1c;」こうなってますけど、これでは反応しないはずです。![]()
〔例〕画像を右に入れ、色を乗せるときは
| .sidebar-title { margin:0; margin-bottom:10px; padding:5px 10px; background:url(/blog/_images/blog/_***/*****/1234567.gif) no-repeat right center; background-color:#BBC6FE; border-bottom:1px dotted #9a9a9a; font-size:x-small; } |
〔例〕画像を左に入れ、色を乗せるときは
| .sidebar-title { margin:0; margin-bottom:10px; padding:5px 10px; background:url(/blog/_images/blog/_***/*****/1234567.gif) no-repeat left center; background-color:#BBC6FE; border-bottom:1px dotted #9a9a9a; font-size:x-small; } |
サイドバータイトルの色を変えよう
/*—–Side—–*/ 〔スタンダード1のタグ〕
| .sidebar-title { margin:0; padding:3px 5px; margin-bottom:5px; background:#003366; font-size:x-small; color:#ffffff; } |
サイドバータイトルの色を変えるには、background:#003366;を変えればOKです。
#003366の部分を好きな色に変えましょう。
「#003366」の部分は自分で好きな色を載せてください。
サイドバータイトルの文字色を変えよう
/*—–Side—–*/ とあります。その中の
| .sidebar-title { margin:0; padding:3px 5px; margin-bottom:5px; background:#003366; font-size:x-small; color:#ffffff; } |
color:#ffffffの#ffffffを変えましょう。
その中に、color:#ffffff がなければ、書き加えてください。
サイドバータイトルの文字リンク色を変えよう
/*—–Side—–*/ とあります。
その中に↓↓↓のタグがあるか確認してください。
あれば書き直せばOKです。
なければ書き加えましょう。
| .sidebar-title a:link { color:#333333; } .sidebar-title a:visited { color:#333333; } .sidebar-title a:active { color:#333333; } .sidebar-title a:hover { color:#333333; } |
をあつかいます。
color:#333333の#333333を変えましょう。
・a:link は ページ全体のリンク(まだ開いてない部分の色)
・a:visited は ページ全体のリンク(一度開いたことがある部分の色)
・a:active は ページ全体のリンク(その部分を選択しているときの色)
・a:hover は ページ全体のリンク(マウスを乗せているときの色)
サイドバー本文
サイドバー本文の文字色を変えよう
/* Articles */
| .sidebar-body { margin:0; padding:0 10px; } |
の中に
color:#ffffff;があれば#ffffffを変えましょう。
なけでば color:#ffffff; を書き加えましょう
| .sidebar-body { margin:0; padding:0 10px; color:#ffffff; } |
サイドバー本文の文字リンク色を変えよう
/*—–Side—–*/ とあります。
その中に↓↓↓のタグがあるか確認してください。
あれば書き直せばOKです。
なければ書き加えましょう。
| .sidebar-body a:link { color:#333333; } .sidebar-body a:visited { color:#333333; } .sidebar-body a:active { color:#333333; } .sidebar-body a:hover { color:#333333; } |
をあつかいます。
color:#333333の#333333を変えましょう。
・a:link は ページ全体のリンク(まだ開いてない部分の色)
・a:visited は ページ全体のリンク(一度開いたことがある部分の色)
・a:active は ページ全体のリンク(その部分を選択しているときの色)
・a:hover は ページ全体のリンク(マウスを乗せているときの色)
サイドバーの中の文字の位置を変えよう
/*—–Side—–*/ とあります
| .sidebar-body { margin:0; } |
padding-left:12px;
padding-bottom:12px;
を付け加えます。

| .sidebar-body { padding-left:12px; padding-bottom:12px; margin:0; } |
padding-left:12px; の12pxの部分を変えると左端からの幅が変わります
padding-bottom:12px; の12pxの部分を変えると下からの幅が変わります
上からの幅を変えたいときは padding-top:12px;
右からの幅を変えたいときは padding-right:12px;
を付け加えて数字を変えてください。
カスタムペインの左右の余白を作ろう
サイドバーに外枠をつけようとすると、カスタムペインの部分の字が横幅いっぱいに入ってしまいます。
これだとちょっと見にくいので変えると良いでしょう。
| /*–Custom Pane–*/ .custom-body { padding:1px 0; } |
というのがあります。
これに
padding-left:8px;
padding-right:8px;
を付け加えます。
数字は自分で調整してください。
こんな感じです
| /*–Custom Pane–*/ .custom-body { padding:1px 0; padding-left:8px; padding-right:8px; } |
NEWを変えよう
サイドバーのRSSに表示される「NEW」を変えます。
元のタグはこんな感じです。
| .new { margin-left:6px; color:#ff0000; font-weight:bold; } |
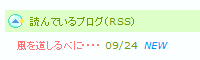
NEWの文字色を変えよう
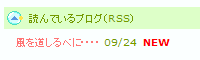
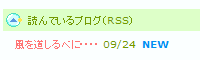
color:#ff0000; の #ff0000 を変えます。
自分の好きな色に変えてください。
私は color: #0092F2; に変えてみました。
| .new { margin-left:6px; color: #0092F2; font-weight:bold; } |
斜体にする方法
font-style: oblique; を書き加えます。
| .new { margin-left:6px; color: #0092F2; font-style: oblique; font-weight:bold; } |
字を細くする方法
font-weight:bold; を消す 又は font-weight:normal;と書き直す。
| .new { margin-left:6px; color: #0092F2; font-style: oblique; font-weight:normal; } |
プロフィール
プロフィールの中の矢印画像を変えよう
サイズは11×11くらいが良いです。
もう少し大きくても入るとは思いますよ。

/*–Profile–*/ とあります。その中の
| .profileLink { padding-left:12px; background:url(/blog/_skin/system/images/arrowR_small_gray.gif) no-repeat left center; } |
① background:url(/blog/_skin/system/images/arrowR_small_gray.gif) no-repeat left center;
ここに自分の入れたい画像を載せます。
② ①をして一回保存してみます。
画像と文字が重なっていなければする必要はないですが、もし重なっている場合は
padding-left:12px;を付け加え12pxを変えましょう。![]()
| .profileLink { padding-left:12px; background:url(/blog/_images/blog/_▲▲▲/*****/0123456.gif) no-repeat left center; padding-left:12px; } |
上下が切れてしまう場合は、
padding-top:12px;
padding-bottom:12px;
を付け加えるといいかもしれません。
プロフィールの中の矢印画像を消そう
![]()
/*–Profile–*/ とあります。その中の
| .profileLink { padding-left:12px; background:url(/blog/_skin/system/images/arrowR_small_gray.gif) no-repeat left center; } |
padding-left:12px;
background:url(/blog/_skin/system/images/arrowR_small_gray.gif) no-repeat left center;
を消します。
プロフィールに画像を入れる方法
2パターンあります。
■1つ目
画像として
![]() を用意して入れました。
を用意して入れました。
| /*–Profile–*/dt.profile-img { float:left; }dd.profile-status{ margin-left:85px; line-height:180%; }.profileLink { padding-left:12px; background:url(/blog/_skin/system/images/arrowR_small_gray.gif) no-repeat left center; }.nice { margin:0; padding:0 2px; background:#ffd900; border:1px solid #0090ff; } |
① .profileLink の中を消します。
padding-left:12px;
background:url(/blog/_skin/system/images/arrowR_small_gray.gif) no-repeat left center;
② dd.profile-statusに
background:url(/blog/_images/blog/_▲▲▲/******/1234567.gif)no-repeat left center;
padding-left:20px;(画像の大きさによって20を調節してください)
を足します。
| /*–Profile–*/dt.profile-img { float:left; }dd.profile-status{ background:url(/blog/_images/blog/_▲▲▲/******/1234567.gif)no-repeat left center; padding-left:20px; margin-left:85px; line-height:180%; }.profileLink { }.nice { margin:0; padding:0 2px; border:0px solid #0090ff; } |
■2つ目
今回は1つめに更に ![]() を足してみます。(もちろんどちらかだけでもOKです。)
を足してみます。(もちろんどちらかだけでもOKです。)
| /*–Profile–*/dt.profile-img { float:left; }dd.profile-status{ background:url(/blog/_images/blog/_▲▲▲/******/1234567.gif)no-repeat left center; padding-left:20px; margin-left:85px; line-height:180%; }.profileLink { }.nice { margin:0; padding:0 2px; border:0px solid #0090ff; } |
#profile{
margin-bottom:10px;
background:url(/blog/_images/blog/_▲▲▲/*****/0123456.gif) no-repeat right bottom;
}
を足します。
right bottom の部分は好みで変えてOKです。
| /*–Profile–*/ #profile{ margin-bottom:10px; background:url(/blog/_images/blog/_▲▲▲/*****/0123456.gif) no-repeat right bottom; }dt.profile-img { float:left; }dd.profile-status{ background:url(/blog/_images/blog/_▲▲▲/******/1234567.gif)no-repeat left center; padding-left:20px; margin-left:85px; line-height:180%; }.profileLink { }.nice { margin:0; padding:0 2px; border:0px solid #0090ff; } |
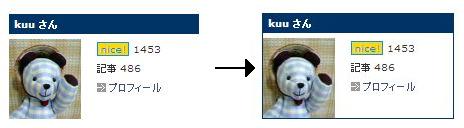
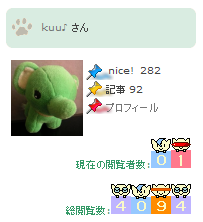
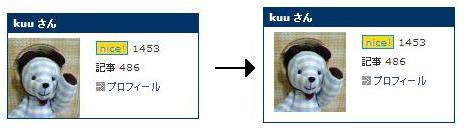
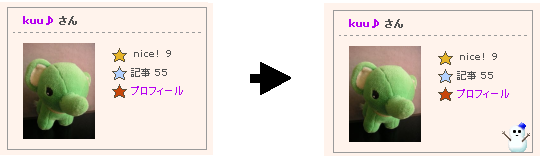
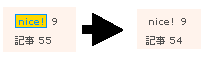
プロフィール内の「nice!」の文字色と外線の色と背景色を変えよう
/*–Profile–*/
| .nice { margin:0; padding:0 2px; background:#ffd900; border:1px solid #0090ff; color:#0090ff; } |
① background:#ffd900; を変えると〔nice!〕の字の背景色が変わります。
他の背景と同色にするのなら消してしまいましょう。
② border:1px solid #0090ff; が周りの線の部分です。
・線を消すのなら 1pxを 0pxにすればOK ・solidは線の種類です。solidを↓↓の種類に変えることもできます。
solid(普通の線)
double(二重の線)
groove(谷型の線)
ridge(山型の線)
inset(凹型)
outset(凸型)
dotted(点線) 一部の古いブラウザでは未対応
dashed(大きい点線) 一部の古いブラウザでは未対応
none(線なし)
・#0090ffの部分が色の指定です。好きな色に変えましょう。
③ color:#0090ff; が〔nice!〕の字の色です。
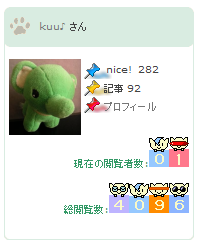
〔記事〕と同じ色にするのなら消してしまいましょう。![]()
/*–Profile–*/
| .nice { margin:0; padding:0 2px; border:0px solid #0090ff; } |
これで上の見本の写真のようになります。
カレンダー
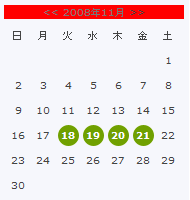
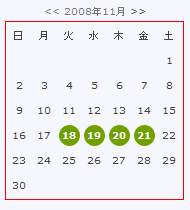
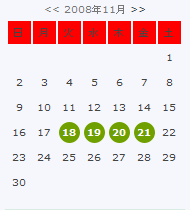
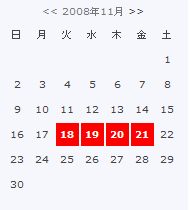
カレンダーの更新した日付部分の画像を変えよう
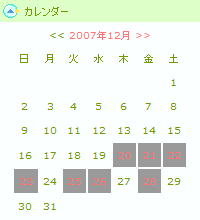
![]()
カレンダーの画像サイズは、24×24くらいまでがいいと思います。
変える部分を赤 緑で書いています。
/*–Calendar–*/ とあります。その中の
| #calendar td.link { background:#d0ceb7; font-weight:bold; } |
を変えます。![]()
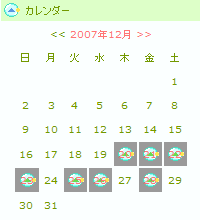
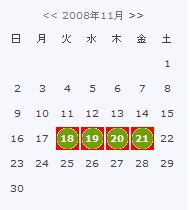
変えたタグ〔見本〕
| #calendar td.link { background:url(/blog/_images/blog/_▲▲▲/*****/0123456.gif) no-repeat center center; background-color:#C8DDFF; font-weight:bold; } |
①画像を入れます
background:url(/blog/_images/blog/_▲▲▲/*****/0123456.gif) no-repeat center center;
②背景の色を変えます
background-color:#C8DDFF; の #C8DDFF をお好きな色に変えてください。
用意した画像が透過してない写真とかであれば②は必要ありません。
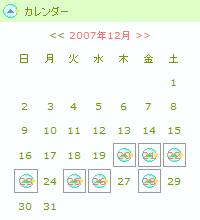
③背景色を消し、枠をつける場合は
background-color:#C8DDFF;を消し、
border:1px solid #9a9a9a; を付け加えます。
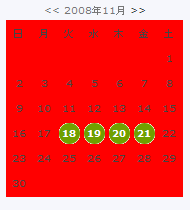
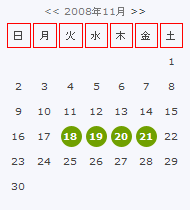
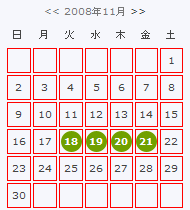
カレンダーを装飾してみよう
| .calendar-date { text-align:center; } | |
| border: 1px solid #FF0000; | background:#FF0000; |
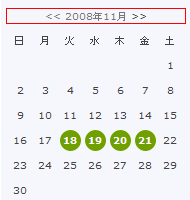 |  |
| .calendar-date { text-align:center; border: 1px solid #FF0000; } | .calendar-date { text-align:center; background:#FF0000; } |
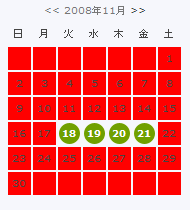
| #calendar table { margin:3px auto; text-align:center; } | |
| border: 1px solid #FF0000; | background:#FF0000; |
 |  |
| #calendar table { margin:3px auto; text-align:center; border: 1px solid #FF0000; } | #calendar table { margin:3px auto; text-align:center; background:#FF0000; } |
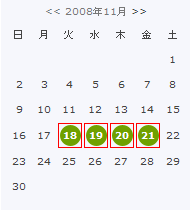
| #calendar th { height:21px; width:21px; font-weight:normal; } | |
| border: 1px solid #FF0000; | background:#FF0000; |
 |  |
| #calendar th { height:21px; width:21px; font-weight:normal; border: 1px solid #FF0000; } | #calendar th { height:21px; width:21px; font-weight:normal; background:#FF0000; } |
| #calendar td{ height:21px; width:21px; font-size:10px; line-height:1; } | |
| border: 1px solid #FF0000; | background:#FF0000; |
 |  |
| #calendar td{ height:21px; width:21px; font-size:10px; line-height:1; border: 1px solid #FF0000; } | #calendar td{ height:21px; width:21px; font-size:10px; line-height:1; background:#FF0000; } |
| #calendar td.link { background:url(/_common/skins/19/images/cal_active.gif) no-repeat center center; font-weight:bold; } | |
| border: 1px solid #FF0000; | background:#FF0000; |
 |  |
| #calendar td.link { background:url (/_common/skins/19/images/cal_active.gif) no-repeat center center; font-weight:bold; border: 1px solid #FF0000; } | #calendar td.link { background:url (/_common/skins/19/images/cal_active.gif) no-repeat center center; font-weight:bold; background:#FF0000; } |
| background-color:#FF0000; | |
 | |
| #calendar td.link { background:url (/_common/skins/19/images/cal_active.gif) no-repeat center center; font-weight:bold; background-color:#FF0000; } |
「読者になる」を変えよう
「読者になる」の画像を変えよう
![]()

〔シンプルワイドのタグを例に解説しますが、どのスキンでもできるはずです。〕
/*–RSS Regist–*/
| #rssRegist { margin-bottom:10px; padding: 4px 0; background: #444444 url(/blog/_skin/system/images/arrowR_large.gif) no-repeat left center; text-align:center; font-weight:bold; line-height:100%; } |
①適当な画像を作ってアップロードします。
画像の背景色およびサイズはタグの指定で変えることができます。
②url(/blog/_skin/system/images/arrowR_large.gif) no-repeat left center;
を書き換えます。
③背景色を変えるときは #444444 を変えてください。
「読者になる」の背景色を変えよう
/*–RSS Regist–*/ とあります。その中の
| #rssRegist { margin-bottom:10px; padding: 4px 0; background: #444444 url(/blog/_skin/system/images/arrowR_large.gif) no-repeat left center; text-align:center; font-weight:bold; line-height:100%; } |
background: #444444の #444444を変えましょう。
(/blog/_skin/system/images/arrowR_large.gif)
を自分で作った画像と差し替えることもできます。
「読者になる」の文字リンク色を変えよう
/*–RSS Regist–*/
| #rssRegist a:link { text-decoration:none; color:#fff; } #rssRegist a:visited { text-decoration:none; color:#fff; } #rssRegist a:active { text-decoration:none; color:#fff; } #rssRegist a:hover { text-decoration:underline; color:#fff;} |
color:#fff;の#fffを変えましょう。
書き方は通常通り #ffffff と記述しましょう。
・a:link は ページ全体のリンク(まだ開いてない部分の色)
・a:visited は ページ全体のリンク(一度開いたことがある部分の色)
・a:active は ページ全体のリンク(その部分を選択しているときの色)
・a:hover は ページ全体のリンク(マウスを乗せているときの色)
スポンサーリンク