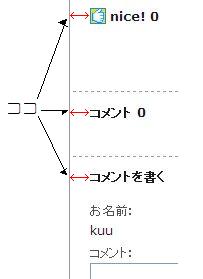
「nice・コメントを書く」の下の線の色を変えよう
/*—–Entry—–*/ とあります (真ん中よりちょっと上)
その中の .entry h4 { の border-bottom:1px solid #888888; を書き換えます
| /*—–Entry—–*/ .entry h4 { margin:0 0 10px 0; padding:3px 0; border-bottom:1px solid #888888; font-size:small; } |
・border-bottom:1pxの数字を変えると線の太さが変わります。
・solidは線の種類です。solidを↓↓の種類に変えることもできます。
solid(普通の線)
double(二重の線)
groove(谷型の線)
ridge(山型の線)
inset(凹型)
outset(凸型)
dotted(点線) 一部の古いブラウザでは未対応
dashed(大きい点線) 一部の古いブラウザでは未対応
none(線なし)
・#888888;は線の色の指定です。
↓ 線とカラーはこちらを参考にしてください ↓


「nice・コメントを書く」の文字の位置を変えよう

/*—–Entry—–*/ とあります (真ん中よりちょっと上)
その中の .entry { に padding-left:12px; を書き加えます。
| /*—–Entry—–*/ .entry { padding-left:12px; margin-top:20px; } |
padding-left:12px; の12pxの部分を変えると左端からの幅が変わります
↓ padding についてはこちらを参考にしてください ↓
「niceの前の画像」を変えよう
![]()
/* nice! */ とあります
その中の #nice h4 { の画像URLを 好きな画像のURL に差し替えます。
| /* nice! */ #nice h4 { background:url(“/blog/_skin/system/images/icon-nice.gif”) no-repeat left center; padding-left:20px; } |
① background:url(/blog/_skin/system/images/icon-nice.gif) no-repeat left center;
ここに自分の入れたい画像を載せます。
② ①をして一回保存してみます。
画像と文字が重なっていなければする必要はないですが、もし重なっている場合は
padding-left:20px;の20pxを変えましょう。
「コメント」の前に画像を入れよう
/* Comments */ とあります
その中にこのタグをコピーして貼り付けます。
| /* Comments */ #comments h4 { background:url(“/_images/blog/_eee/cccccc/xxxxxx.gif”) no-repeat left bottom; padding-left:20px; margin-left:5px; } |
background:url(“/_images/blog/_eee/cccccc/xxxxxx.gif”) no-repeat left bottom;
にはご自分の好きな画像を入れます。
padding-left:20px;
margin-left:5px;
はご自分で、数字を変えて調整してください。
「コメントを書く」の前に画像を入れよう
/* Comment Write */ とあります
その中にこのタグをコピーして貼り付けます。
| /* Comment Write */ #comment-write h4 { background:url(“/_images/blog/_eee/cccccc/xxxxxx.gif”) no-repeat left bottom; padding-left:20px; margin-left:5px; } |
background:url(“/_images/blog/_eee/cccccc/xxxxxx.gif”) no-repeat left bottom;
にはご自分の好きな画像を入れます。
padding-left:20px;
margin-left:5px;
はご自分で、数字を変えて調整してください。
コメント欄の文字色を変えよう
シンプルワイドのタグを例に解説しますが、どのスキンでもできるはずです。
/* Comment Write */ とあります
その中の #comment-write textarea { に color:#ffffff; を書き加えます
color:#ffffff; の #ffffff はお好きな色に変えてください
| /* Comment Write */ #comment-write textarea { height:150px; color:#ffffff; } |
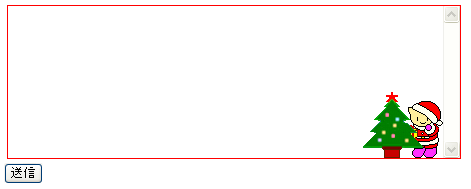
コメント欄に画像を入れよう
シンプルワイドのタグを例に解説しますが、どのスキンでもできるはずです。

![]()

/* Comment Write */ とあります
その中の #comment-write textarea { に 自分で用意した画像のURL を書き加えます
| /* Comment Write */ #comment-write textarea { height:150px; background:url(/blog/_images/blog/_7b3/*****/12345678.gif) no-repeat right bottom; } |
right bottom; のrightは画像を右寄せ bottomは下寄せとなります
・左に寄せたいときは 「left」
・真ん中に寄せたいときは 「center]
・上に寄せたいときは「top」と書き換えましょう。
コメント欄の縦・横幅を広げよう
/* Comment Write */ とあります
その中の .comment-input { の
width:450px; を変更すると横幅がかわります
height:200px; を付け加えると高さがかわります
| /* Comment Write */ .comment-input { width:450px; height:200px; } |
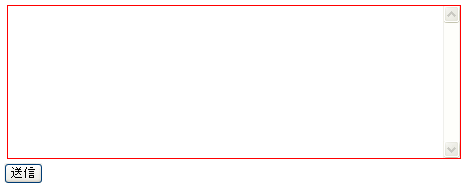
コメント欄の外枠の線の色を変えよう
/* Comment Write */ とあります
その中の
.columnW .comment-input,
.columnW #comment-write textarea { に
border:1px solid #cccccc; を付け加えます
| /* Comment Write */ .columnW .comment-input, .columnW #comment-write textarea { width:358px; border:1px solid #cccccc; } |
・border:1pxの数字を変えると線の太さが変わります。
・solidは線の種類です。solidを↓↓の種類に変えることもできます。
solid(普通の線)
double(二重の線)
groove(谷型の線)
ridge(山型の線)
inset(凹型)
outset(凸型)
dotted(点線) 一部の古いブラウザでは未対応
dashed(大きい点線) 一部の古いブラウザでは未対応
none(線なし)
・#cccccc;は線の色の指定です。
スポンサーリンク


